

Hello, and welcome back! Thanksgiving having passed, it’s officially acceptable to start Christmas preparations (not that we would have held off much longer anyway)!

Here is what we used:
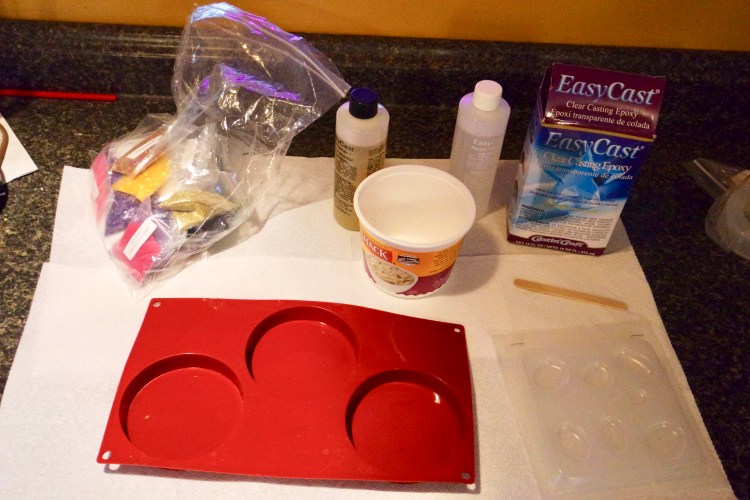
Easy Cast clear casting epoxy or its like is available on Amazon. I ordered the molds from Amazon as well, some time ago, but they always have a large selection. The glitter is left over from my nail lacquer making days. It’s all solvent resistant and mostly glass glitter (although I’m not completely certain that’s necessary with resin). This set up is for 3 coasters and 6 pebble molds (Evie calls them “magic rocks”). We ended up making a bracelet as well with the left over resin. I used a rubber mold for that (not pictured).
To start off, we made sure the counter surface was covered. I prefer newsprint, but we didn’t have it on hand, so we worked with paper towel. If you get this stuff on your counter or table, wipe it away fast! It’s very difficult to chisel off later without doing some damage.
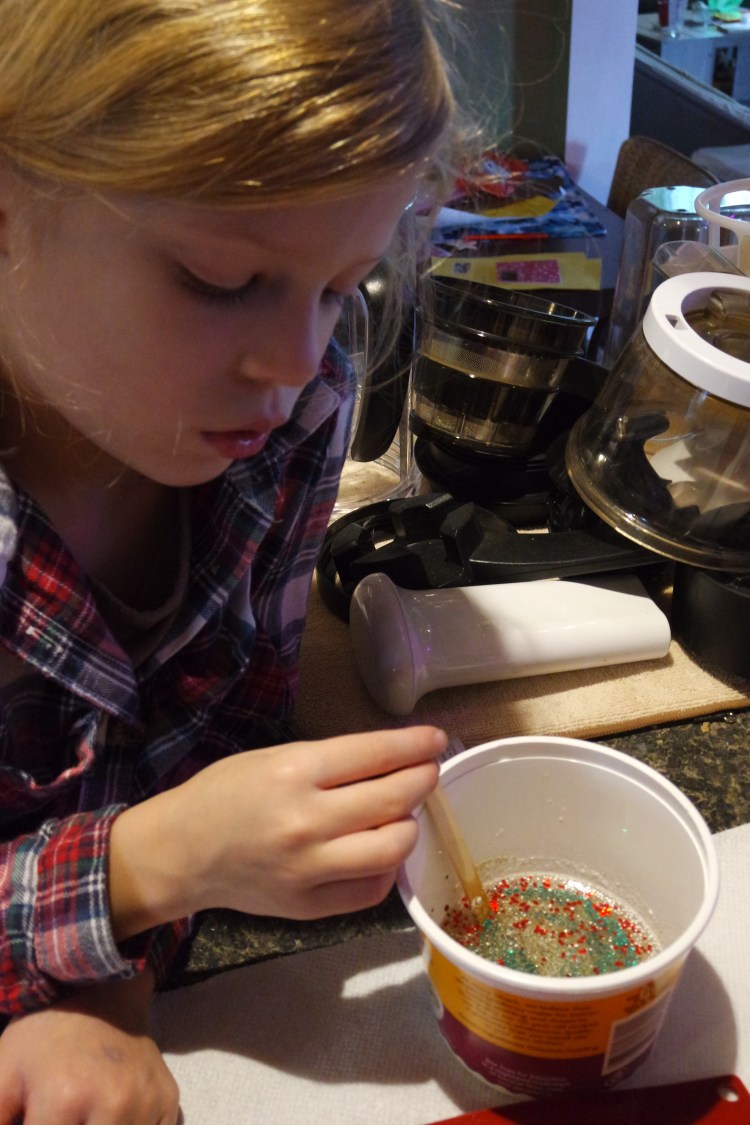
In order to measure and mix the resin, we used these disposable cups. Clear Cast requires an even amount of resin and hardener. If you get the ratio off by much, it won’t harden properly, so the measuring cups are advisable.

Evie helped by mixing the resin and selecting the glitter. You have to pour both parts into a larger container and mix slowly for at least a minute, until the result is of uniform color and consistency. You don’t want to stir too briskly, because that will create bubbles in the finished product.


The rubber bracelet mold is the one to the far left in the first photo above. It was a bit more challenging to fill than the others. We had to wedge the side open in order to pour the mixture in, but it worked out in the end.


Here are our finished coasters. They photograph sort of yellowish, but look more clear in person. I’m quite pleased with the result!


We really enjoyed making these fun and functional crafts. I’ve done resin coasters before and they all get put to good use! If there are any winter crafts that you enjoy/recommend leave a comment. We’re always looking for new ideas!
-Cate

Aww such a cute diy. I want to try too.
LikeLiked by 1 person
Thanks Maggie! Let me know how they turn out, if you do! 🙂
LikeLiked by 1 person